HomeAboutPostsTagsProjectsRSS

proxmox

Updated
Words798
TagsRead1 minute

Overview

This guide provides step-by-step instructions for installing and enabling content caching for a macOS virtual machine (VM) in Proxmox.

Install a macOS VM

Follow the tutorial here to install a macOS VM in Proxmox.

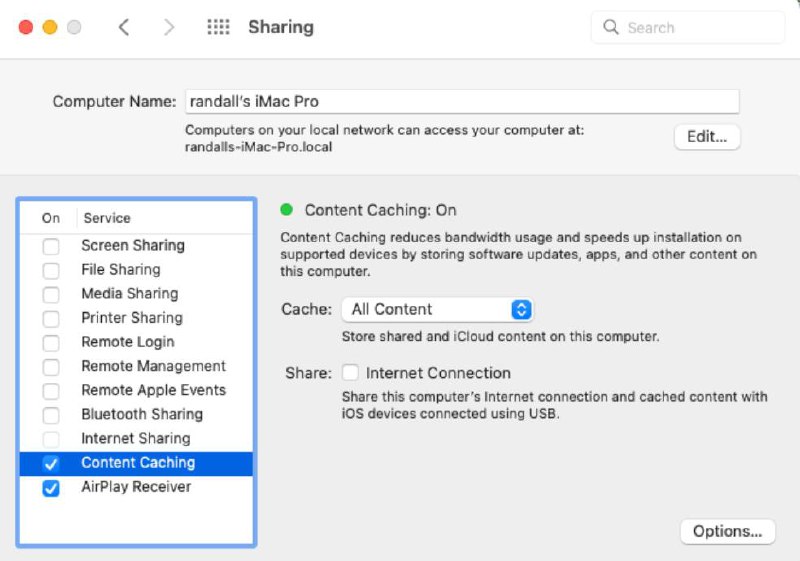
Enable Content Caching

If you encounter difficulties enabling content caching through the Sharing menu, follow the instructions provided here .

Registration

If you are unable to register and receive a “Content Caching is temporarily unavailable” message, follow these steps:

  1. Post-install OpenCore configuration.
  2. Fix GenSMBios by following the steps here .
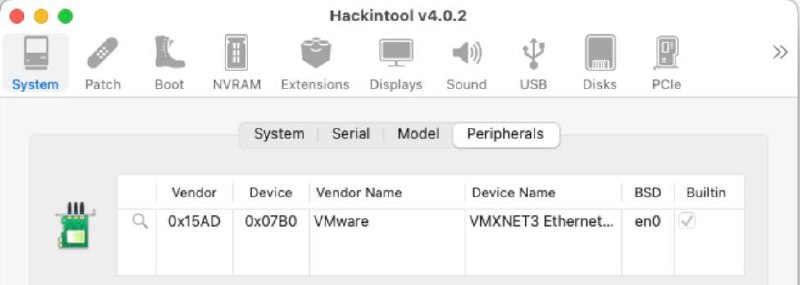
  3. Fix en0 by verifying en0 as build-in. Details can be found here .

Image: en0

  1. Fix ROM by following the steps here .

  2. Reboot your VM and verify the content caching status.

    Reboot and verify the content caching status, you should be seen Activated: true and Active: true

> AssetCacheManagerUtil status

Content caching status:
    Activated: true
    Active: true
    ActualCacheUsed: 2.79 GB
    CacheDetails: (3)
        iCloud: 23.86 GB
        Mac Software: 211.7 MB
        Other: 701.7 MB
    CacheFree: 14.28 GB
    CacheLimit: 45 GB
    CacheStatus: OK
    CacheUsed: 24.77 GB

Image: Content Caching Status

For additional information and discussion, refer to the Reddit post .

Updated
Words516
TagsRead2 minutes

Problem: Unable to Boot System After Upgrading to Proxmox 7.4.6

After upgrading to Proxmox 7.4.6 and rebooting the system, an error message appears, stating “disk ’lvmid//’ not found.” This issue is caused by a bug in GRUB.

Solution: Using Super-Grub2 to Boot and Repair GRUB2

To resolve this issue, follow these steps:

  1. Create a bootable USB using Super Grub Disk2 Rescue ISO .

  2. Boot the system from the Super Grub Disk2 USB.

  3. Upon booting, an orange-colored menu will appear.

  4. Select “Enable GRUB2’s RAID and LVM support” and press Enter.

  5. Press Esc to return to the main menu.

  6. Select “Boot manually” and press Enter.

  7. Select “Operating Systems” and press Enter.

  8. Scroll down to the second last option, “Linux /boot/vmlinuz-5.xx.xx-x-pve (lvm/pve-root),” and press Enter.

  9. The system will reboot and boot into Proxmox VE as before.

  10. Once successfully booted into Proxmox VE, open the Proxmox VE shell.

  11. Run the following command to repair GRUB2: update-grub.

However, running the update-grub command may throw errors related to disks not found. To resolve this, perform the following steps:

  1. Inside the Proxmox VE shell, run the following command to extend the LVM: lvextend -L +1G /dev/pve/.

  2. After extending the LVM, run the following command to reduce the LVM back: lvreduce -L -1G /dev/pve/.

  3. After completing these steps, you should be able to use the system as normal.

References: